Showing posts with label Traybakes. Show all posts

Friday, 31 July 2015

Fudgy Chocolate Brownies with Malt Ice-Cream & Coffee Liqueur Syrup

I know I have mentioned this before, but my three children are obsessed with chocolate and cannot understand why everything I bake does not include it in some form. The truth is, although I like chocolate, I can also take it or leave it and it doesn’t set my heart aflutter in the same way that it does others’.
 
Having said that, I do love a good brownie and by this I mean one that is fudgy in texture with a deep chocolate taste. I find it amazing how so many foods that claim to be chocolate don’t actually taste of it. In this regard, when making brownies, it is important to balance the sweetness of the sugar with the chocolate that is used and this often means using a good quality chocolate with a high percentage of cocoa solids. Also, whether one likes it or not, brownies contain a lot of sugar but it is the ratio of the sugar to the other ingredients which gives them their characteristic crisp exterior which gives way to a moist and fudgy centre.
 
Some brownie recipes advocate the use of cocoa powder only and others the use of melted chocolate. Whilst cocoa powder undoubtedly gives the brownies an intensely chocolate flavour, I find that they tend to be more ‘cakey’ than fudgy, which is not what I am after. Using melted chocolate alone creates a brownie which can lack depth of flavour, so I hedge my bets and use both.
 
I am really pleased with this recipe because I think that I have finally succeeded in baking brownies that satisfy my exacting requirements. I used a slightly larger tin than normal which resulted in 24 generous sized brownies measuring approximately 6cm x 6cm each.
 
I have not included nuts in this recipe as my children prefer that they be omitted and also because brownie purists insist that they should not be used, but feel free to add some, roughly chopped is you like. To be honest, I rather like the nutty crunch of pecans and often would include them despite the disapproving howls of annoyance that escape from my children.
 
You will see in the accompanying photos that I have topped the brownie in them with a scoop of malt ice-cream and a coffee liqueur syrup. I have included the recipe for the syrup here, but feel that the malt ice-cream deserves its own post which I hope to publish soon (trust me… it’s really good).
 

Ingredients:

Brownies:
265g chocolate
230g butter
430g caster sugar
150g plain flour
20g cocoa powder
4 large eggs, lightly beaten
Coffee liqueur syrup:
100ml coffee flavoured liqueur
25g caster sugar
 

Method:

1. Preheat the oven to 170C/Fan Oven 150C/Gas mark 3. Line a 36cm x24cm x 5cm baking tray/tin with non-stick baking parchment and set aside.
2. Put the chocolate and butter in a heatproof bowl and set over a pan of lightly simmering water making sure that you do not let the base of the bowl touch the bubbling water. Stir the chocolate mixture occasionally.
3. Remove the bowl once the chocolate and butter have melted and add the sugar, stirring well until fully incorporated. Sieve the flour and cocoa powder together and stir into the chocolate mixture making sure that no ‘pockets’ of the dry ingredients remain. Lastly add the eggs and stir these in so that they too, are well incorporated.
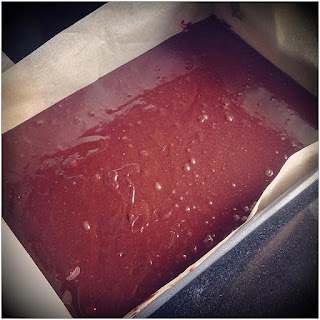
4. Pour the mixture into the prepared tin, levelling the surface with a spatula or the back of a metal spoon and bake in the preheated oven for 40-45 minutes or until the brownies are flaky on top but still a little squidgy in the centre.
5. Leave to cool completely before cutting in to 24 squares. These are lovely served re-warmed slightly with a dollop of ice-cream and a drizzle of the following syrup.
Coffee liqueur syrup:
6. Place all the ingredients into a small saucepan and bring up to simmering point. Allow to bubble uncovered until the liquid has reduced by half. Allow to cool slightly before drizzling over ice-cream.

Makes 24.
 

Monday, 23 February 2015

Apple Shortcake Squares

I was recently looking back through my blog posts and noticed that to date I have included relatively few recipes that use apples. I was actually quite surprised because they are easily obtained, are hugely popular and I love them.
 
One of the most popular desserts in any Irish household is apple pie. In fact, most restaurant menus in this country always have an apple pie, tart or crumble of some type on it! To be honest, no matter how accomplished a baker you are, if you can’t produce a noteworthy apple tart, you might as well give up! In Ireland your baking reputation stands or fails on the quality of the apple pie you can produce. When making my apple pie, I like to use two or three varieties of apple; Bramleys, because they break down to a purée-like consistency when cooked, Granny Smiths because  they retain their shape and provide texture and I also sometimes use Pink Lady or Braeburn for their distinctive apple taste.  I have always preferred using a pinch of ground cloves rather than ground cinnamon in my apple pies, but each to their own. I know some bakers who like to use ground ginger, but for me, the judicious use of ground cloves (only a pinch is required) really bring out the flavour of the apples.
 
So many people, even in suburban areas have their own apple trees and this can be a wonderful source of freshly picked fruit later on in the year. I have a number of apple trees growing in my garden, which have been planted for six or seven years at this stage and provide me with some wonderful fruit at the end of the summer. It is a source of great annoyance to me that my children love to go out into the garden after a windy night and use the fallen fruit as makeshift sliotars when practising their hurling and camogie! Windfall apples, provided they haven’t been lying on the ground too long, can still be used for making chutneys or in baking… so you can imagine my irritation at seeing the apples being hurled down the garden at force rather than for being used to make tasty treats!
 
The recipe that I’m giving here is my version of the Apple Shortcake Squares which are on sale in many Irish bakeries. At their simplest these are made with apples sandwiched between two layers of pastry and dredged with caster sugar. My version uses self-raising rather than plain flour which creates a pastry with a more shortcake-like consistency but without being spongy like a cake. The pastry dough is on the soft side so I don’t roll out the base but rather press it gently into the tin with the tips of my fingers to create an even layer. For the top I flour some non-stick baking parchment and place the pastry on this, flattening it out slightly with my hands. I then flour the slightly flattened pastry and place another layer of non-stick baking parchment on top. I then proceed to roll out the pastry into a thin layer, large enough to cover the top of the Apple Squares. This is such a handy way of rolling out any pastry, but particularly this one which is very soft and a little difficult to manage.
 
Finally, I should mention that I recommend using Granny Smith apples for making these squares. I find that cooking apples are too mealy and break down too much, but that the Granny Smiths retain some texture. Also unlike ‘normal’ pastry which should be given a chance to rest, you can roll out and use this pastry once you have made it.
 

Ingredients:

Apple filling:
5-6 large Granny Smith apples, peeled, cored and chopped into 1cm cubes
25g caster sugar
25ml water
Pastry:
240g self-raising flour
125g butter, cubed
15g icing sugar
1 large egg, lightly beaten
30ml cold water
To finish:
25g caster sugar for dredging
 

Method:

Apple filling:
1. Place the apples, sugar and water into a medium sized saucepan over a moderate heat. Bring up to simmering point and allow to cook for 8-20 minutes until the apples have softened but not broken down. Remove from the heat, set aside and allow to cool completely.
Pastry:
2. Preheat oven to 180C/Fan oven 160C/Gas Mark 4. Line a 30cmx20cm traybake tin with non-stick baking parchment and set aside.
3. Place the flour into a large mixing bowl and add the cubed butter. Rub the butter into the flour using the tips of your fingers until the mixture resembles breadcrumbs. Make a well in the centre and add the egg and water and mix together using a fork until everything comes together.
4. Divide the dough in half. Press one half of the dough into the bottom of the prepared tin, flattening it out with your fingers or the back of a spoon to create a level surface. Spoon the COOLED apple mixture onto the pastry into the tin, spreading it out evenly.
5. Roll out the other half of the dough between two sheets of floured non-stick baking parchment into a rectangle the same size as the tin (30cm x 20cm). Remove the top sheet of baking parchment and lifting the rolled out pastry on the other layer of baking parchment flip it over to cover the apple filling. Tuck in the edges of the pastry making sure that the apple is covered.
6. Bake in the preheated oven for 25-30minutes until light golden brown. Remove from the oven and dredge with the caster sugar. Set aside to cool before cutting into 12 even squares.

Makes 12 squares.
 

Monday, 8 December 2014

Cranberry & Lemon Traybake

Although I love traditional Christmas cakes and puddings laden with booze-soaked dried fruit, I appreciate that not everyone is a fan and that sometimes what is preferred is something a little lighter, especially after all the feasting and excess of the festive season.

I remember with fondness the Christmases of my childhood… My grandmother would cook and bake the most fantastic food and the whole family would spend Christmas together, eating, laughing, exchanging gifts, squabbling over games of Scrabble and watching television. I distinctly remember watching The Sound of Music, Chitty Chitty Bang Bang and The Wizard of Oz MANY times over the years!

The culinary highlight was dinner on Christmas day, but in many ways what I always loved most was the tin of homemade treats that my grandmother had stored away for any unexpected guests who would arrive. Hidden in this tin were her mince pies made with homemade mincemeat and loads of her rich and buttery shortbread biscuits. I absolutely loved them! The tin had to be kept away from me because, in the face of such delicious temptation, I found it impossible to limit myself to just one pie or just one piece of shortbread! To this day, I always make a big batch of shortbread and also mince pies using my grandmother’s mincemeat recipe.
 
My grandmother also made her own cranberry sauce as an accompaniment for the traditional roast turkey. She used fresh cranberries and gently flavoured the sauce with some orange zest and although this was delicious, it never occurred to us to try using the cranberries in any other way. In recent years, I have experimented with cranberries quite a bit and have used them in a lot of my cooking and baking. They are quite sharp, so do need some sweetening, but don’t overdo it as you don’t want to mask their distinctive taste. I especially like popping them whole into cake and muffin batters and love the way that they burst as they bake to release their ruby red juices – they look so Christmassy!
 
I was delighted with how this traybake turned out… it is an easy recipe and when baked easily cut into slices/bars which are a great alternative to many of the richer bakes on offer at this time of year. The finished slices can be stored in an air-tight tin or container for up to 5 days.
 

Ingredients:

450g plain flour
1tsp baking powder
225g caster sugar
Finely grated zest of 1 lemon
225g butter, cubed
1 large egg, lightly beaten
50ml water
Filling:
350g cranberries
115g caster sugar
Juice of 1 lemon
2tblsp cornflour/arrowroot
 

Method:

1. Preheat the oven to 180C/Fan Oven 160C/Gas Mark 4. Line a 30cm x 23cm shallow baking tin (I used a shallow roasting tray) with non-stick baking parchment and set aside.
2. Sieve the flour and baking powder into a large bowl and add the caster sugar and lemon zest. Mix together so that everything is evenly distributed.
3. Add the cubed butter and using the tips of your fingers, rub into the dry ingredients until the mixture resembles breadcrumbs. Add the egg and water and using a fork mix everything together to form a soft dough.
4. Evenly press two-thirds of the dough onto the base of the prepared tin and set aside, reserving the remaining dough.
5. Mix all the ingredients for the filling together in a small bowl and then scatter over the dough lined tin. Take the reserved dough and break of little pieces and scatter evenly on top of the cranberries. There is no need to level or press the filling down.
6. Once you have used up all the dough, place the tin on a baking tray in the preheated oven. Bake for approximately 45 minutes until golden brown and the cranberries have started to pop and release their juices. Allow to cool in the tin and then cut into slices/bars and serve still slightly warm or at room temperature, dusted with a little icing sugar.

Makes 20-24 slices/bars.
 

Tuesday, 25 November 2014

Ginger Crunch

When I was a child, my favourite biscuits were Gingernuts. I have never been a fan of dunking biscuits into tea – my beloved beverage of choice, as they invariably get all soggy and disintegrate into an unpleasant looking sludge at the bottom of the cup. The only biscuits that I occasionally dunk are Gingernuts as their soakage capacity seems far superior to that of any other biscuit or cookie! The love of a tea/ginger combination has stayed with me into adulthood and, to this day, I still have a soft-spot for anything ginger-flavoured to nibble on with my cup of tea and I am always eager to try new recipes that include ginger! I have been experimenting with recipes for a tea brack with added ginger and once I have perfected the recipe, I will, of course, post it on the blog.

The great thing about ginger is that in comes in a number of different forms, each of which can be used in baking. I often make a ginger cake which uses ground ginger (the root is dried and then ground to a powder), stem ginger (ginger preserved in syrup) and fresh ginger (which can be grated and is very fragrant). In the following recipe I use both ground ginger and ginger syrup and the result is an intensely ginger-flavoured biscuit.
 
These biscuits consist of a ginger flavoured shortbread, topped with ginger icing, which sets to a fudgy consistency which is absolutely addictive. A version of these biscuits is hugely popular in Australia and New Zealand, but to be honest, I had never come across it before and after a little tweaking was delighted with the results. The biscuits are sweet, but the fiery warmth of the ginger prevents them from becoming sickeningly so. What I really loved about them was the contrast between the crunchy shortbread base and the fudgy topping! Yummy!

This is a fairly straightforward recipe. I used Opies ginger syrup to flavour the icing, but if you can’t get this just substitute the same amount of golden syrup.

Ingredients:

150g butter, softened
100g caster sugar
225g plain flour
2tsp ground ginger
1tsp baking powder
Icing:
150g butter
60ml ginger syrup (or golden syrup if unavailable)
300g icing sugar
1tblsp ground ginger
 

Method:

1. Preheat oven to 180C/Fan Oven 160C/Gas Mark 4. Line a shallow 20x25cm (or similar sized) baking tin with non-stick baking parchment and set aside.
2. Place the butter and sugar into a large mixing bowl and using a hand-held electric mixer, beat together until light and fluffy.
3. Sift the flour, baking powder and ground ginger together and add to the butter mixture, mixing everything together with a wooden spoon until a dough just starts to form. Press the dough evenly into the prepared tin and level the surface with a back of a spoon. Bake in the preheated oven for 20-22 minutes until a light golden brown. Remove from the oven and allow to cool completely (do not remove the shortbread from the tin). Once completely cooled, cover with the shortbread with the icing.
Icing:
4. Place the butter and syrup in a medium sized saucepan over a moderate heat. Once the butter has melted add the icing sugar and ground ginger and stir with a whisk over the heat for a further 2 minutes until you have a smooth icing with no pockets of icing sugar remaining. Pour the icing over the cooled shortbread and set aside to cool and set. Once the icing has set, cut the shortbread into bars/squares.

Makes 20-24 squares.